You will need a desktop computer with internet connection. Chrome or Firefox browsers are recommended. Please note that WordPress is currently not optimized for editing on mobile devices.
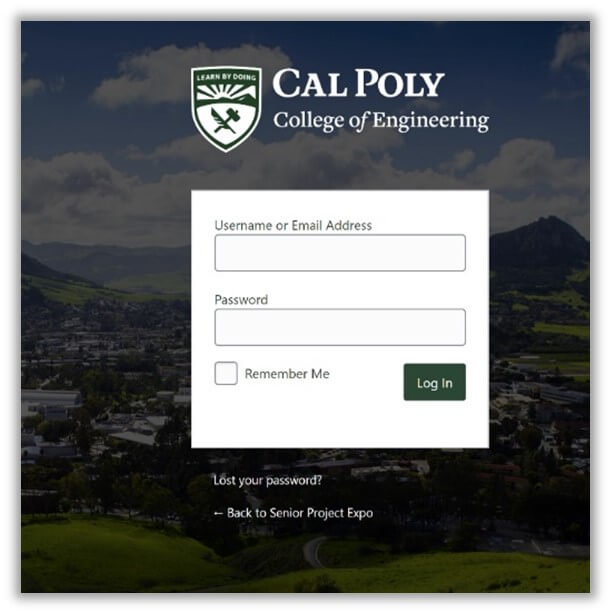
Go to projectexpo.calpoly.edu/admin and enter your assigned username and the temporary password you received by email after completing the webform in Part I of this user guide.
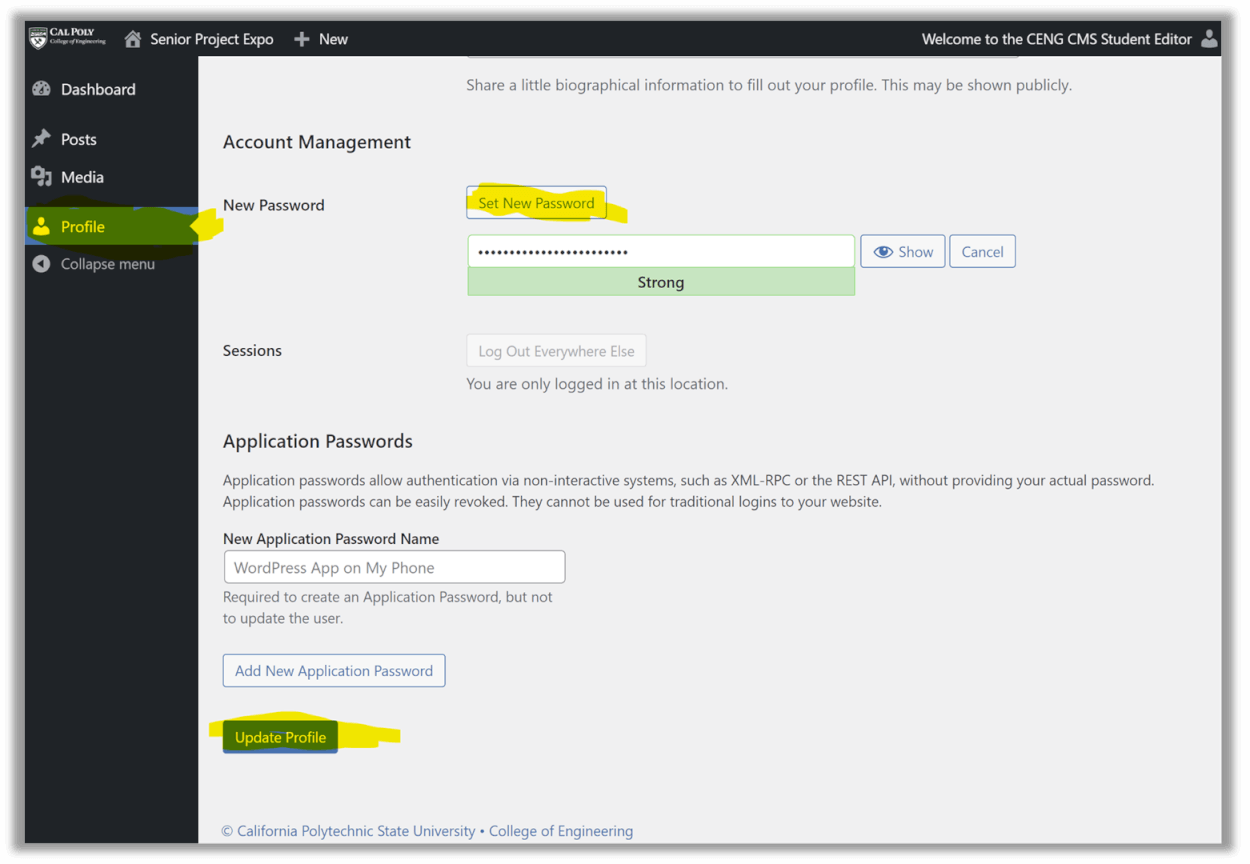
You can change your password by going to “Profile” on the left-hand dashboard menu, and select “Set New Password.” Make sure your password is strong, as noted by the green indicator on the screen. Then, save your new password by clicking on the “Update Profile” button.
The following video demonstrates the steps for Part II:
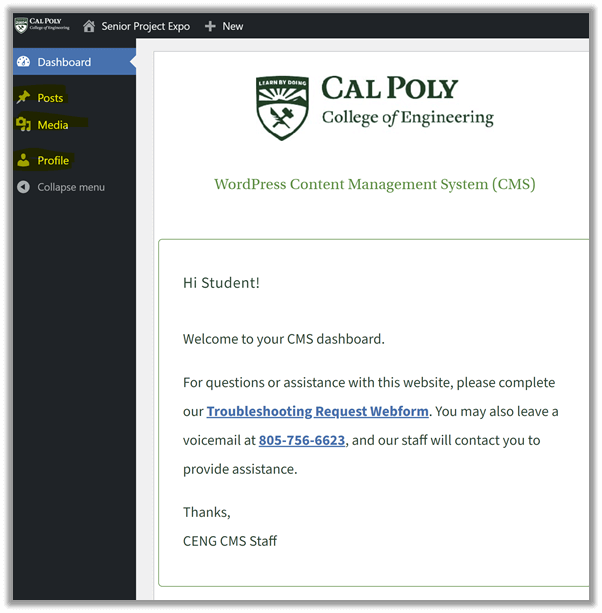
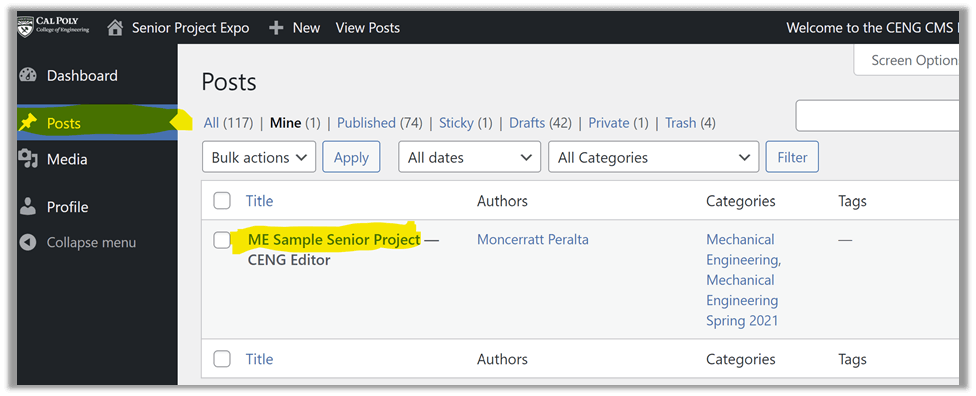
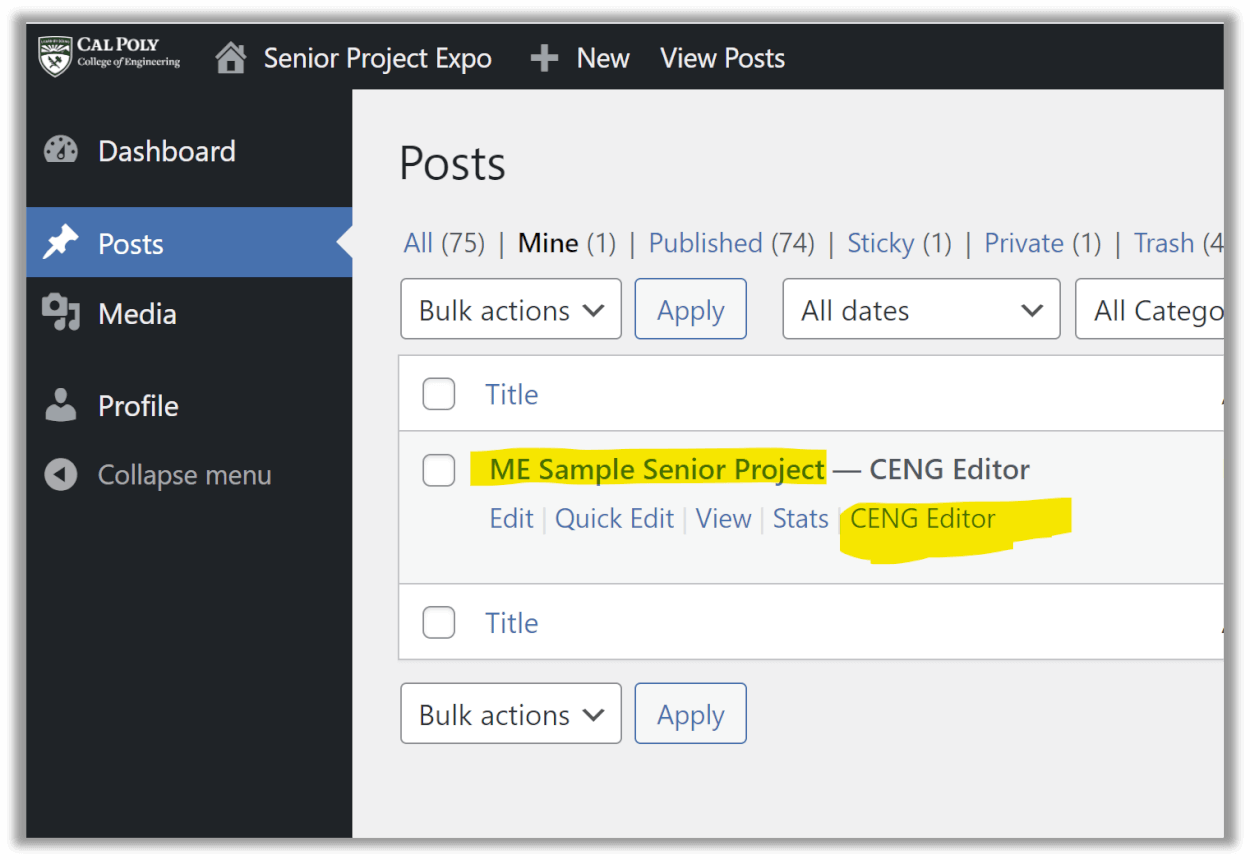
In WordPress, your project webpage is referred to as a post. To access your page, go to “Posts” on the dashboard, and click on the title of your project.
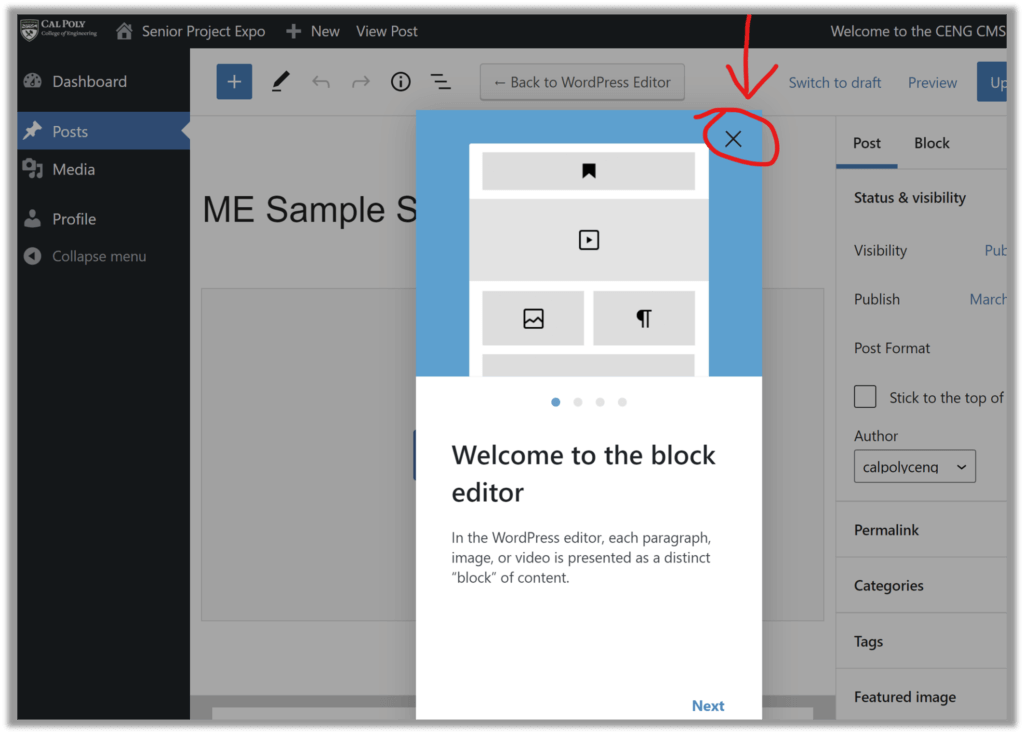
Note: A dialog box may appear stating “Welcome to the Block Editor.” If you see it, just click the X symbol to close the dialog box.
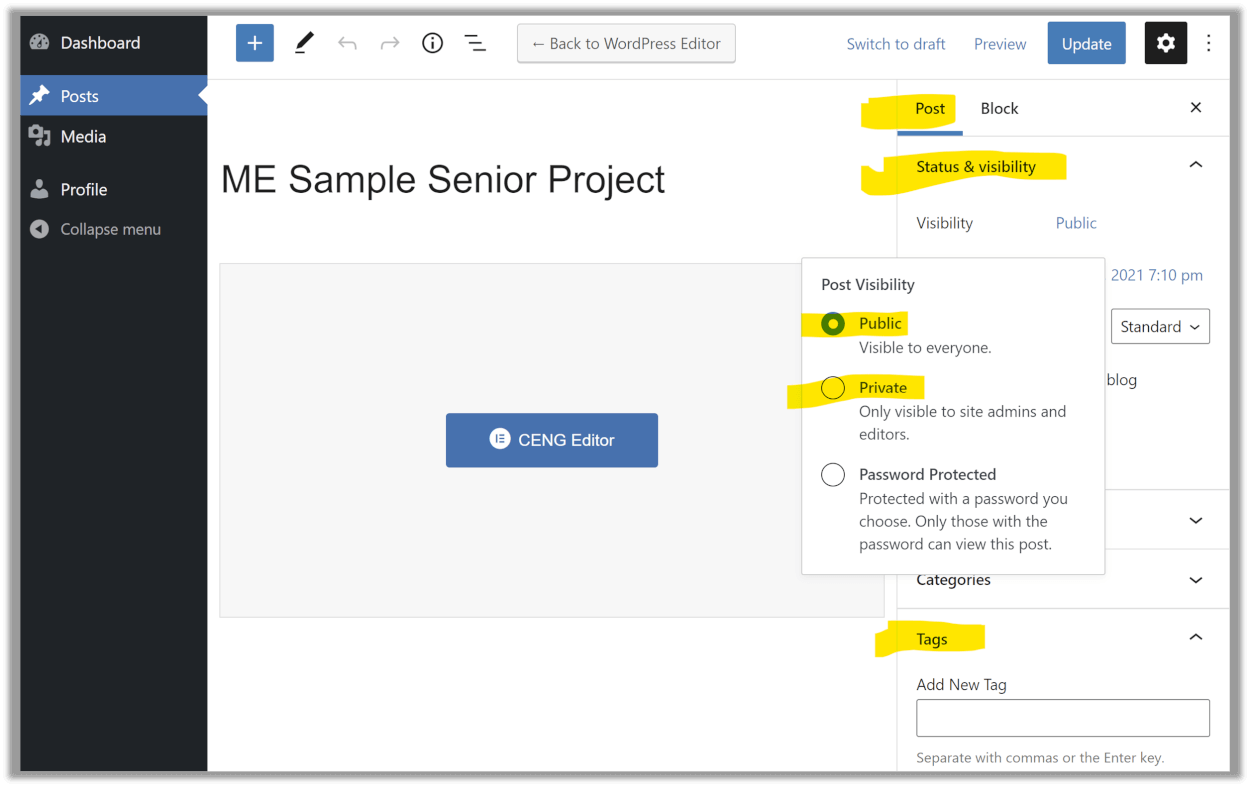
On the right-hand menu of the settings screen, go to the “Post” tab.
Status & visibility: This is set to Public by default. But you can make it Private until you are ready to share your page with your advisor/sponsor for review.
Note: DO NOT use the “Password Protected” setting yet, because doing so will disable crucial editing tools. You will be able to set a webpage password for review purposes later (see Part VII of this user guide).
Tags (Optional): You can add tags or keywords to help visitors find your project. Tags can include a project’s topic, sponsor name, advisor name, etc.
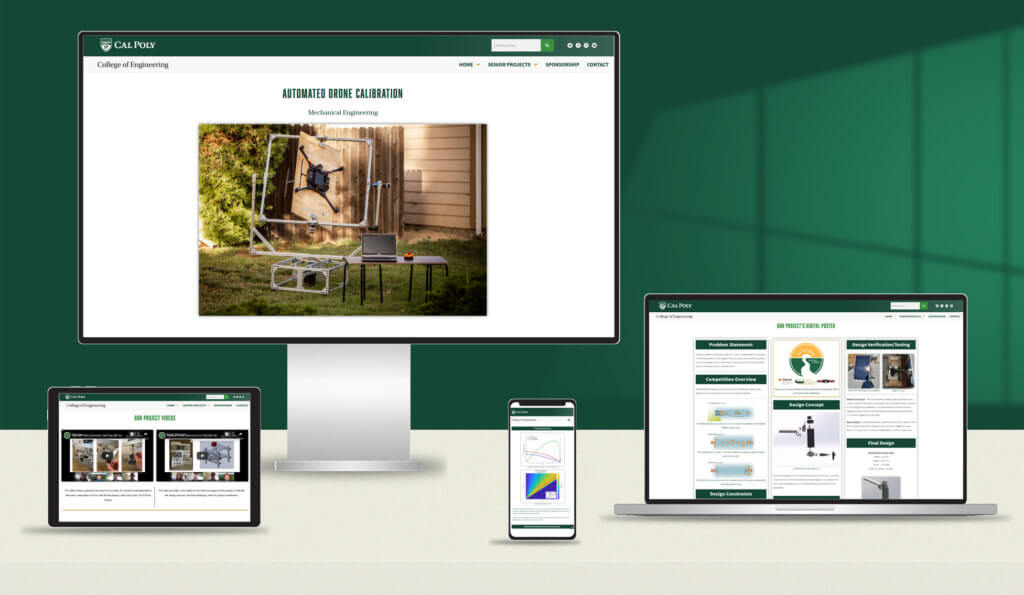
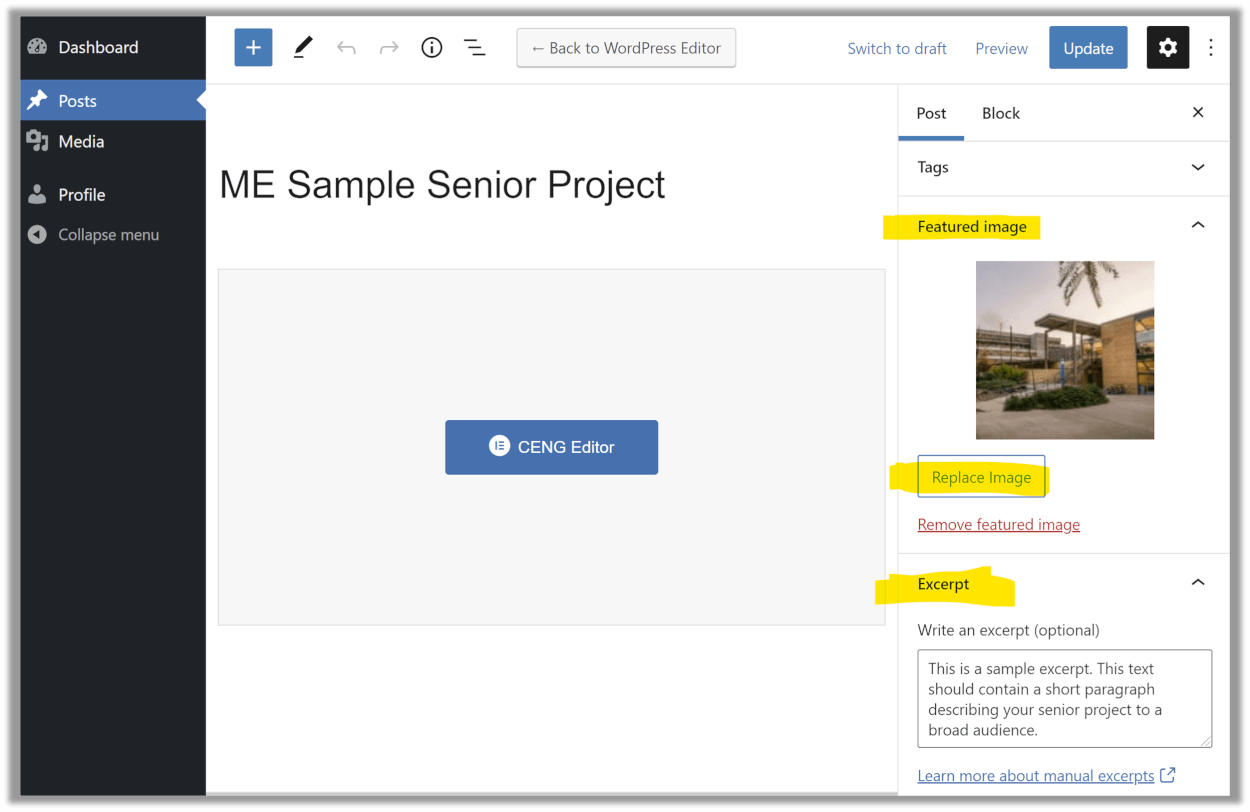
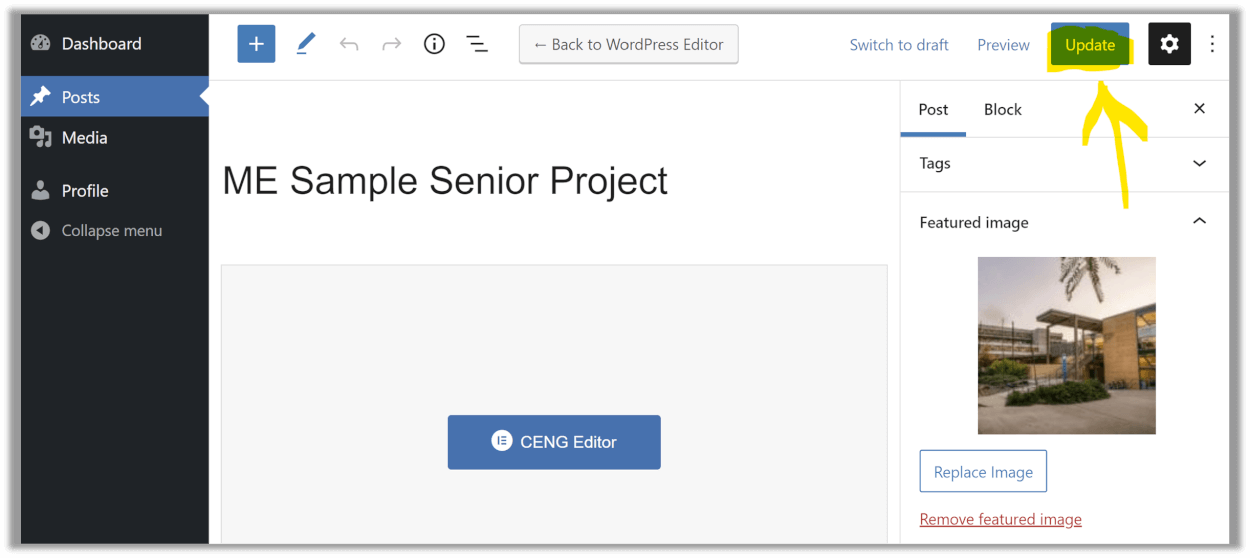
Featured Image: Replace the default photo by uploading your own. This will be the primary image of your page as well as its thumbnail preview. The featured image can be a photo of your completed prototype, a photo of the team members, a screenshot of your project video, or another image that you feel represents your senior project well.
Excerpt: You can fill this content box with a short paragraph that describes your senior project to a broad audience. The Excerpt will appear as a caption beneath your Featured Image on your final project webpage.
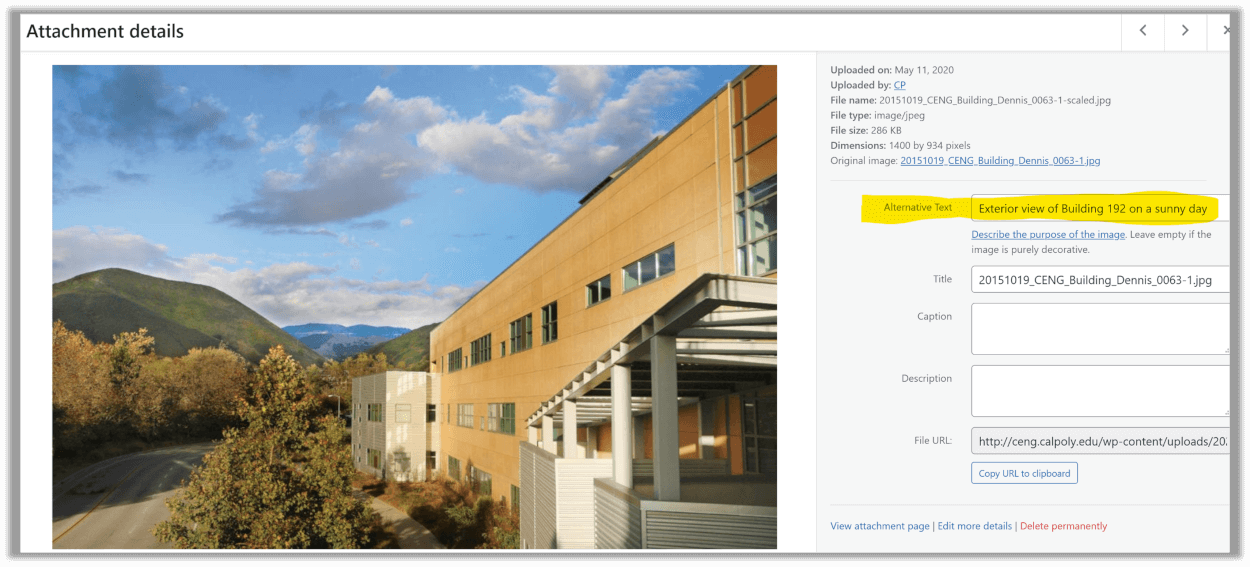
IMPORTANT: Please be sure to add descriptive/alternative (Alt text) to your featured image and to ALL of your image uploads on this site. This way, site visitors who rely on assistive technology, like screen-readers, will know what your image is about. Alt text can be 1-2 sentences. See example:
Click on the blue “Update” button on the top-right to save your settings.
Reminder: Your webpage will only be visible to others if it is set to Public view. To keep your page hidden from public view, make sure its visibility settings are set to Private mode (see tab “B”).
The following video demonstrates the steps for Part III:
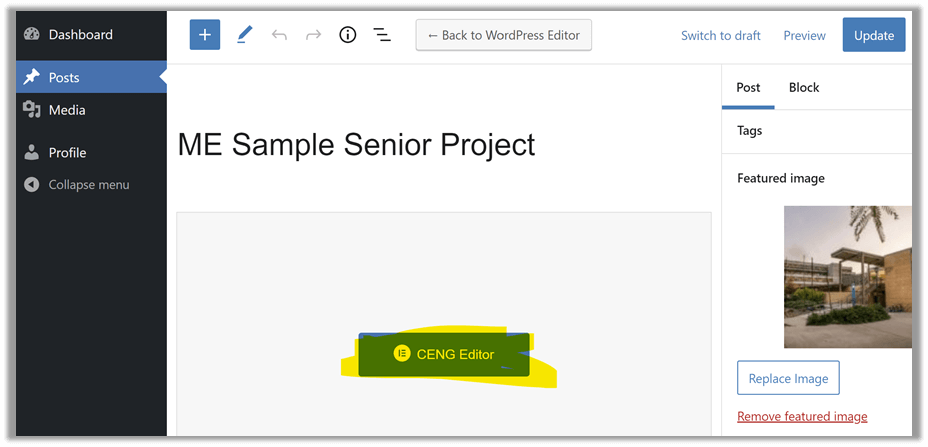
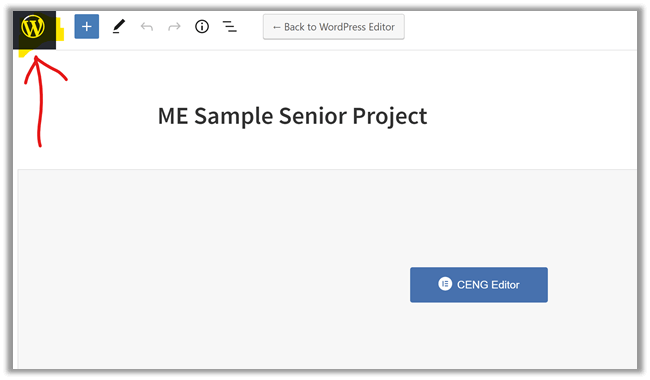
AFTER you have published your page, click on the large, blue “CENG Editor” button to load the drag-and-drop editor. Note: It might take about 10-20 seconds for the editor interface to load.
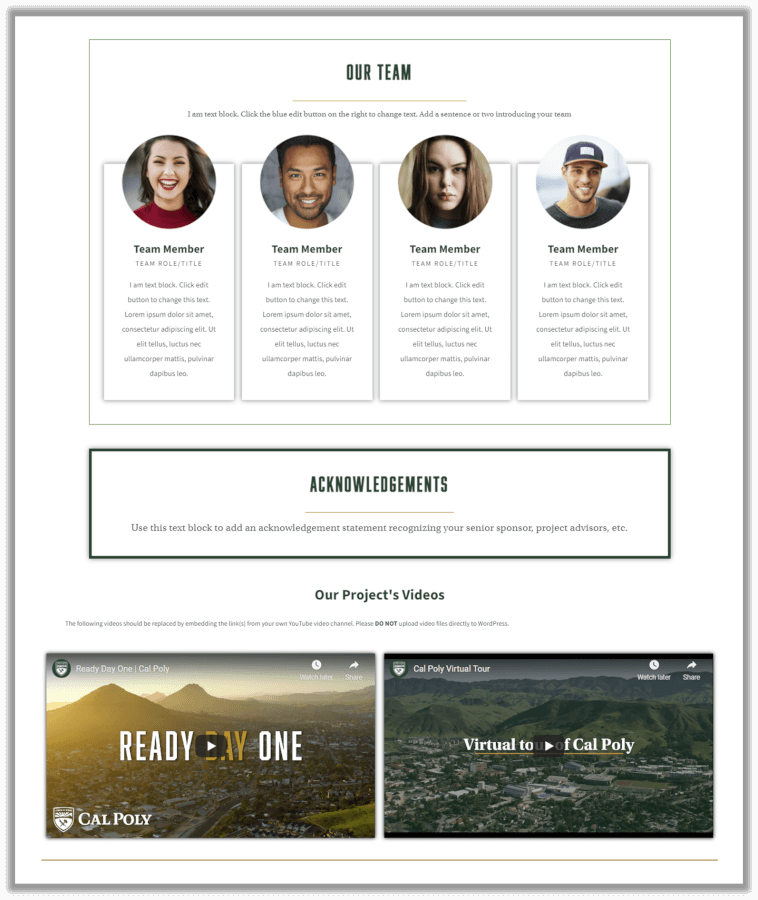
Once the CENG Editor loads, your webpage template should display with the featured image you selected and its excerpt.
Just beneath, you should also see a content template with various sections of placeholder media. These are the areas where you will populate your senior project content.
The following video demonstrates the steps for Part IV:
General Rules:
Please DO NOT add any external (non “calpoly.edu”) links to your webpage, as these links could become broken over time, and external site content is out of our control.
Please DO NOT upload any non-image files to your webpage. This includes video files. Your project videos need to be uploaded to YouTube separately and embedded on your webpage (see Part VI of this user guide).
Please note that any external links or non-image files will be promptly removed from the website by the site administrator.
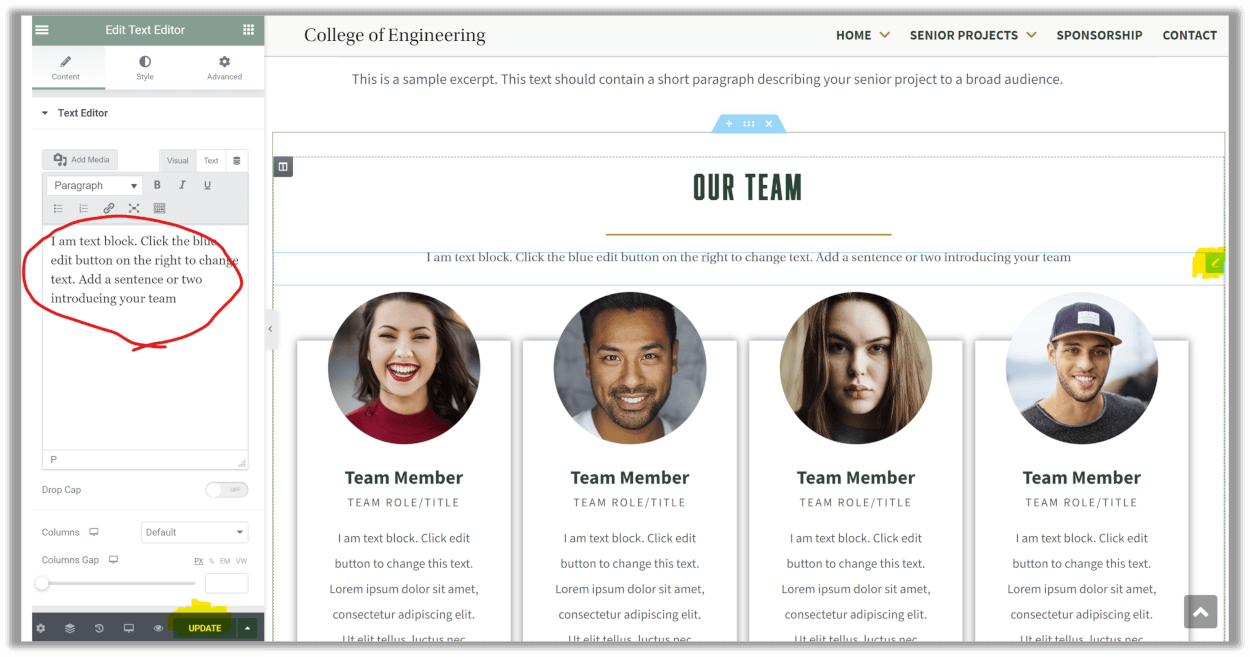
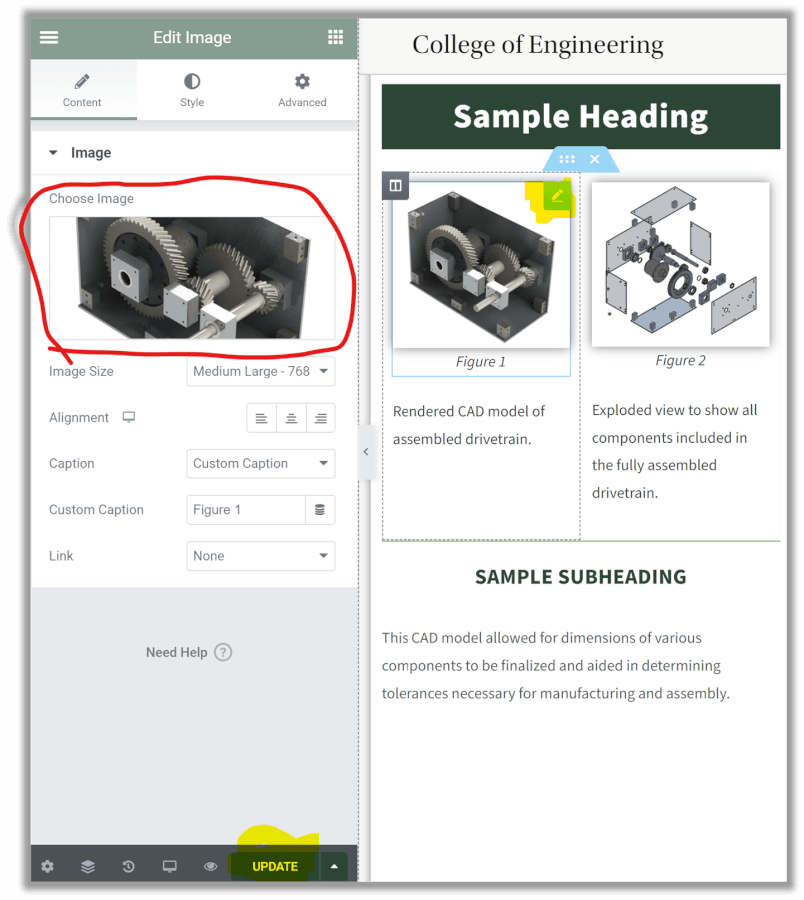
To edit the default content and add your own (including all text and images), start by clicking on the blue pencil icon on the right corner of any element you want to edit. You’ll see a content panel on the left of the screen where you can edit the selected content. For example, replace the “Team Member” heading with your own name, etc. To save your changes, click on the green “UPDATE” button on the bottom of the editing panel (see examples on the following screenshots).
Example – Editing a heading or text box:
Example – Editing images:
Note: The photos in the team member bio section are rounded image files. But you can also use standard square or rectangular-shaped photos, or graphics.
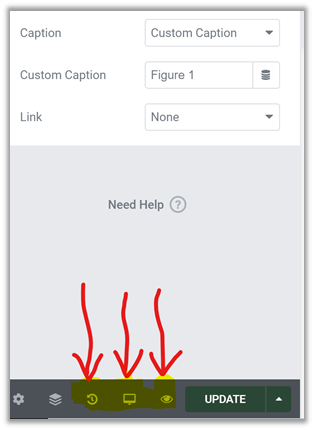
Previewing your content changes: You can preview your changes by clicking on the eye symbol on the bottom-left. You can also preview the mobile and tablet views of your content by selecting the screens symbol.
Note: The pre-designed template sections are already set to be mobile responsive. This includes all fonts and sizes.
Edit History and Undo: If you wish to view your changes history or undo a particular step, click on the clock icon to view your recent changes.
In addition to the Team Member Profiles section, the 3-column Digital Poster section, the Acknowledgements section, and the Videos section, you will also see several other optional image sections that you may choose to use for your webpage. These include an image slideshow, and a gallery section.
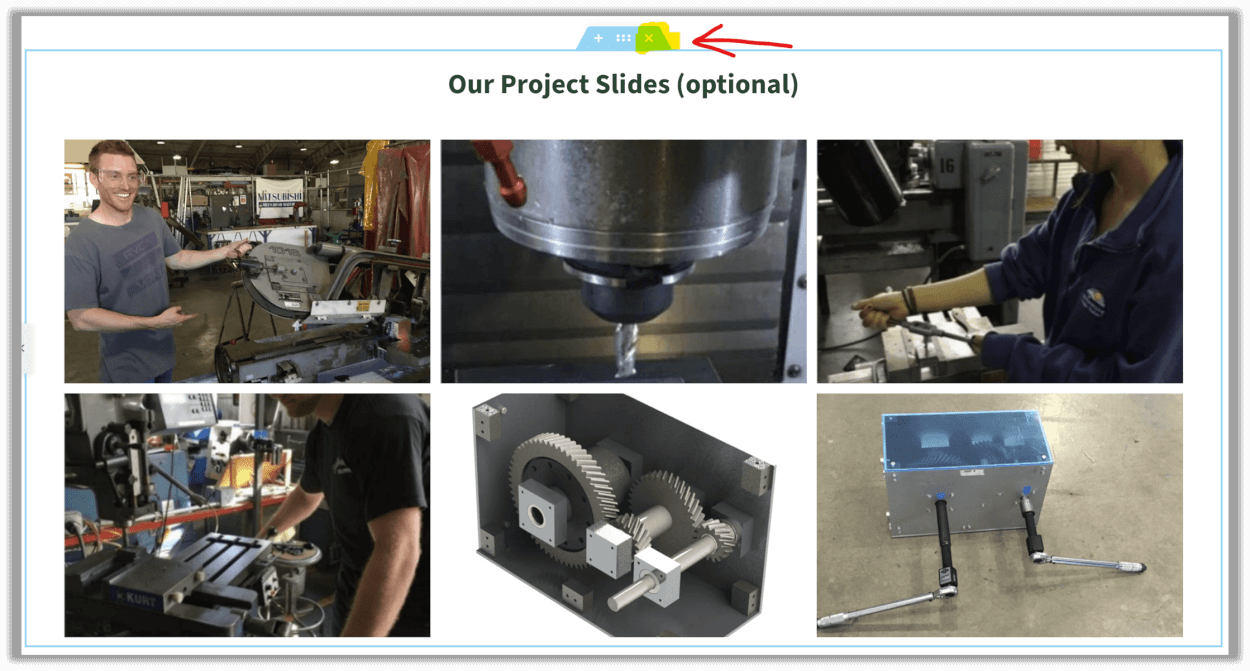
You can add your project/team photos to the galleries. Or, if you don’t want to use the optional content sections, just click on the “x” at the top of any section to delete it from your webpage. Remember to click on the green “Update” button to save your changes.
Editing tips:
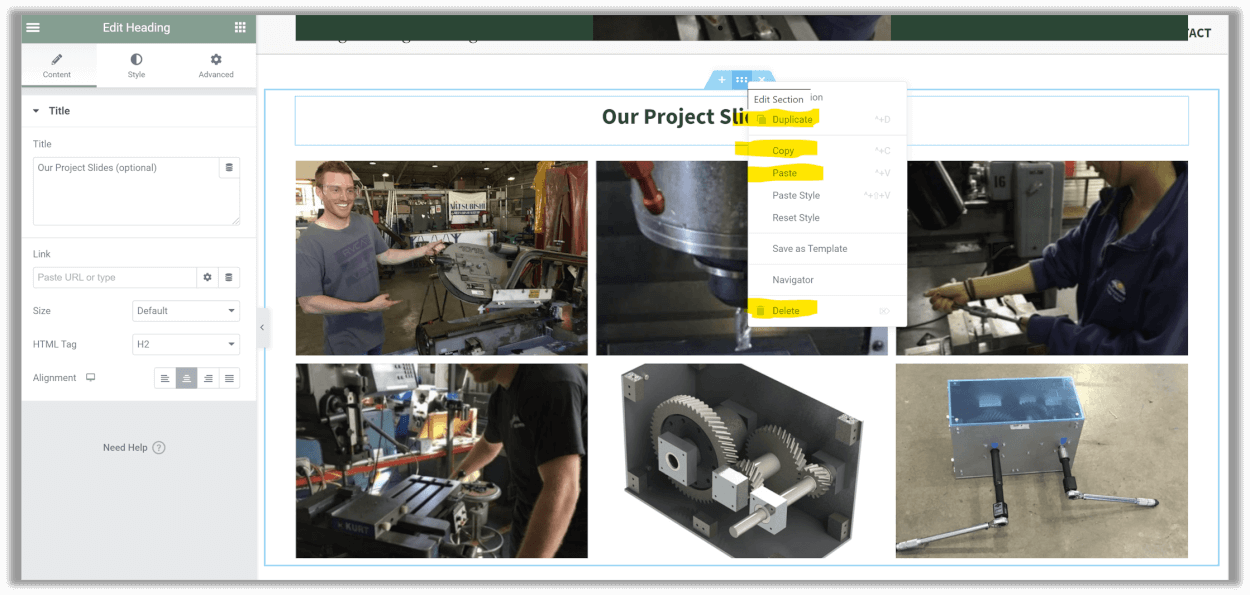
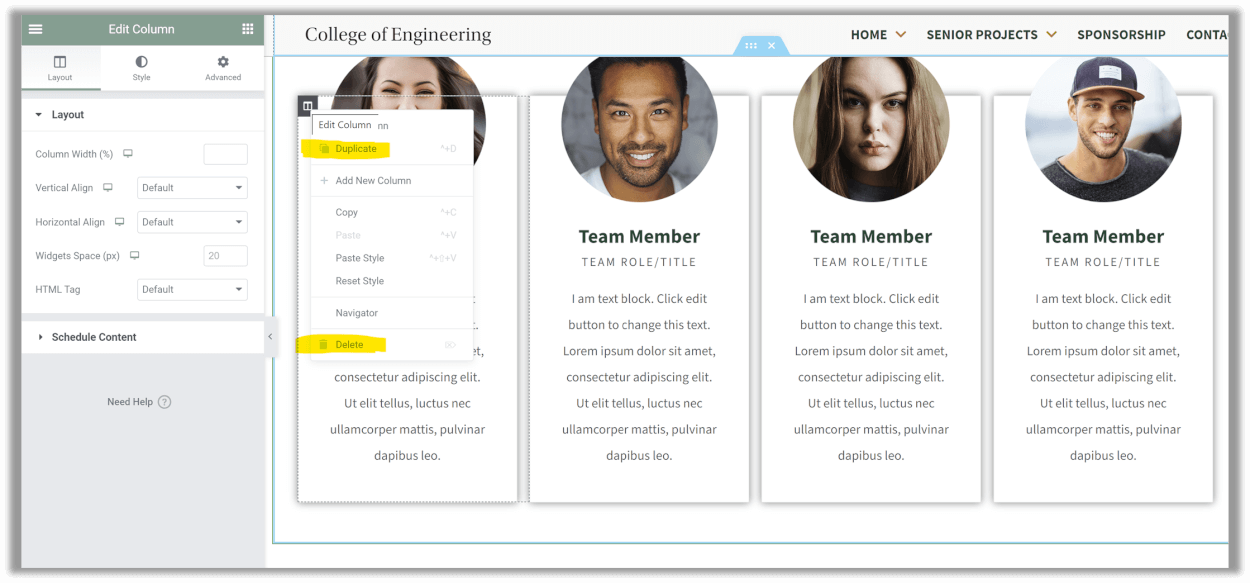
1. Duplicating, copying & pasting, or deleting elements: You can duplicate any element, column, or even an entire section, and then just swap out the content. This can save you time so that you don’t have to recreate similar content elements.
Right-click on the top blue handle of a section to access the “Duplicate”, “Copy/Paste”, or “Delete” options.
2. Changing the order and position of elements: You can also change the order of a heading, image, text box, column, or entire content section if it makes sense for your project’s content. To do this, just click and drag on the element you want to rearrange, then drop it where you’d like. The only exception to this is if your professor, advisor, or sponsor specifies that they want the content in a specific order, in which case, you should follow their instructions.
3. Three-column digital poster section: Please use the provided three-column digital poster section for populating your poster content elements. This section is designed to be mobile-responsive and therefore formatted to properly resize for display on mobile devices. While it is possible to upload a single JPEG or PNG image of your entire poster, we discourage this because it does not display properly on mobile devices and the poster text is very difficult to read on small screens.
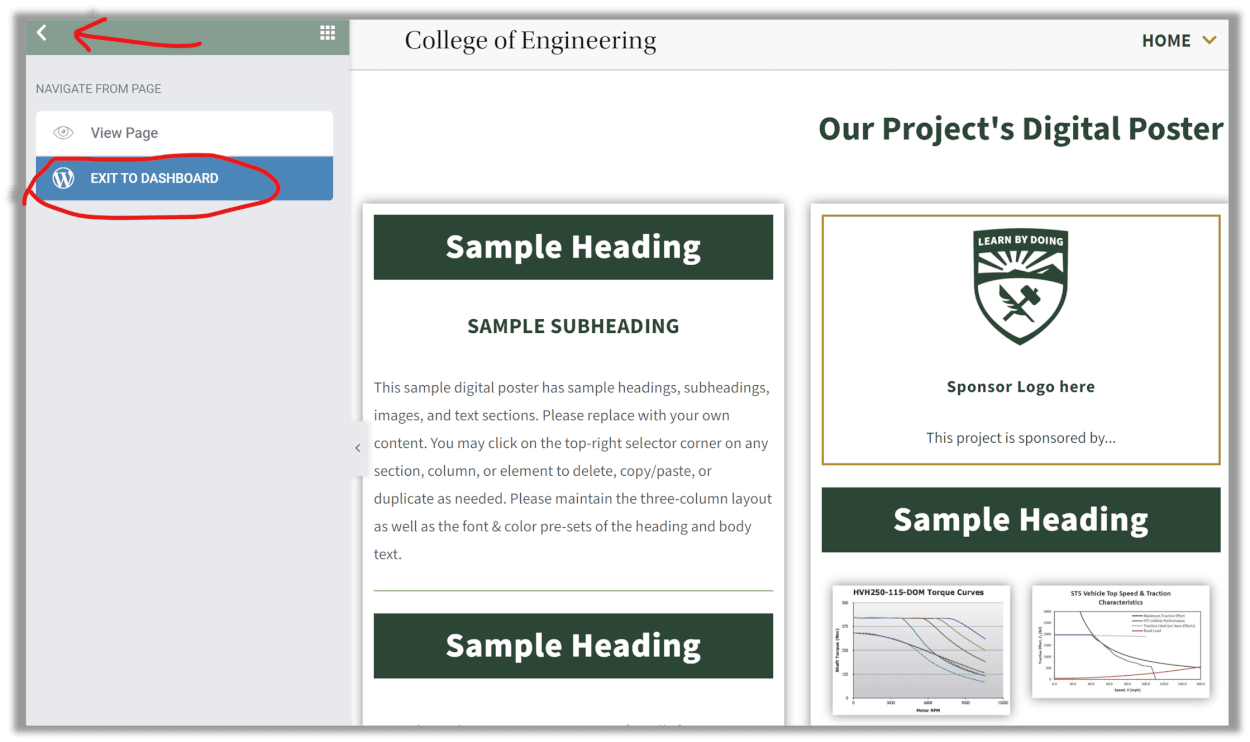
You may exit the CENG Editor at any time by clicking on the menu icon on the top-left and selecting the “EXIT TO DASHBOARD” option. This will take you back to the settings area. Then, you can click on the “W“ in the top-left corner to return to the main dashboard.
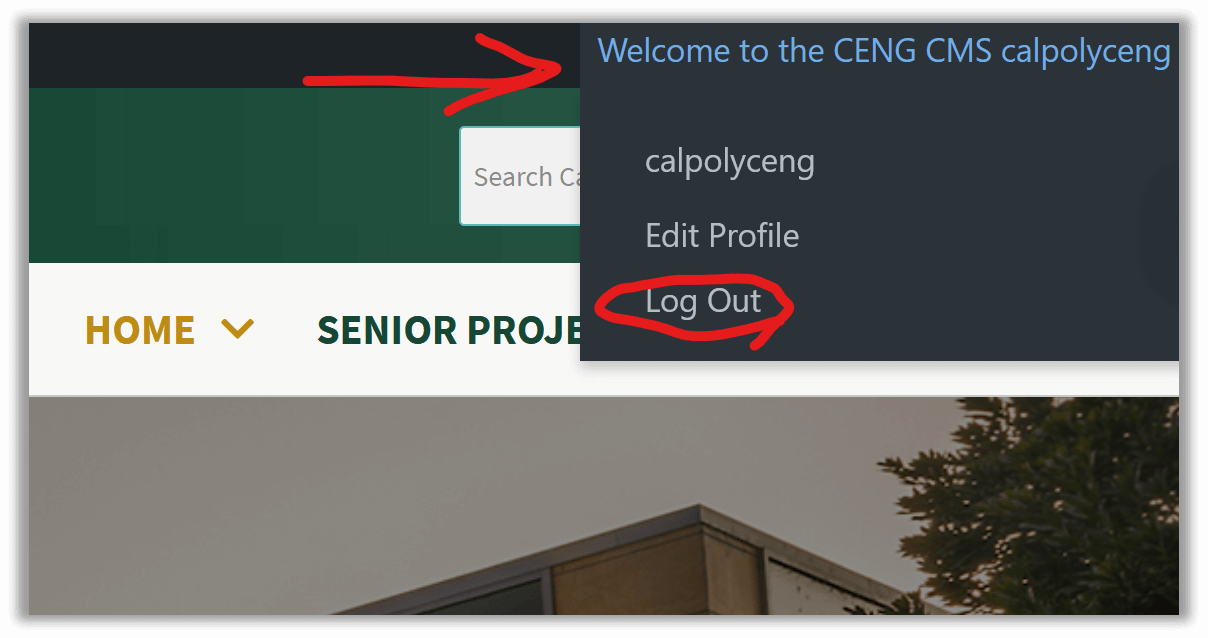
To log out of the website, go to the “Welcome to the CENG CMS” label at the top-right of the dashboard screen, and select “Log Out.”
Going back to the editor to make additional edits: To return to the editor, log in to the website (See Part II of this user guide), then go to “Posts” to locate your project, and hover over the title. Then click on the “CENG Editor.” This will take you straight to the editing tool and template area. Note: The editor might take a few seconds to load.
The following video demonstrates the steps for Part V:
Please make sure your videos DO NOT contain a copyright music track.
Also, remember that you should NOT upload video files directly to WordPress (such as MP4 or MOV files). These files quickly take up site storage space and bandwidth, which can significantly slow down the website load time. Also, these files lack closed-captions, which makes them inaccessible to some viewers.
There are two options for displaying your video on your webpage:
1. Embed your videos from your own YouTube channel (See details on tab “B”).
2. Save your video files to a provided OneDrive folder, where a staff member will upload the videos to a Cal Poly YouTube channel and embed them on your webpage for display (See details on tab “C).
You can choose to host your project videos and embed them on your webpage. If you choose this option, you’ll need to have a YouTube* channel dedicated to your project. Make sure your videos are set to allow embedding.
*Note: The reason YouTube is the recommended platform is because it creates automatic closed captions for your video to help make it ADA compliant. Other hosting platforms, like Vimeo, don’t currently offer this capability. Also, the process for creating a YouTube channel/account is not covered in this user guide. However, there are a variety of online resources that you can search to guide you through that process.
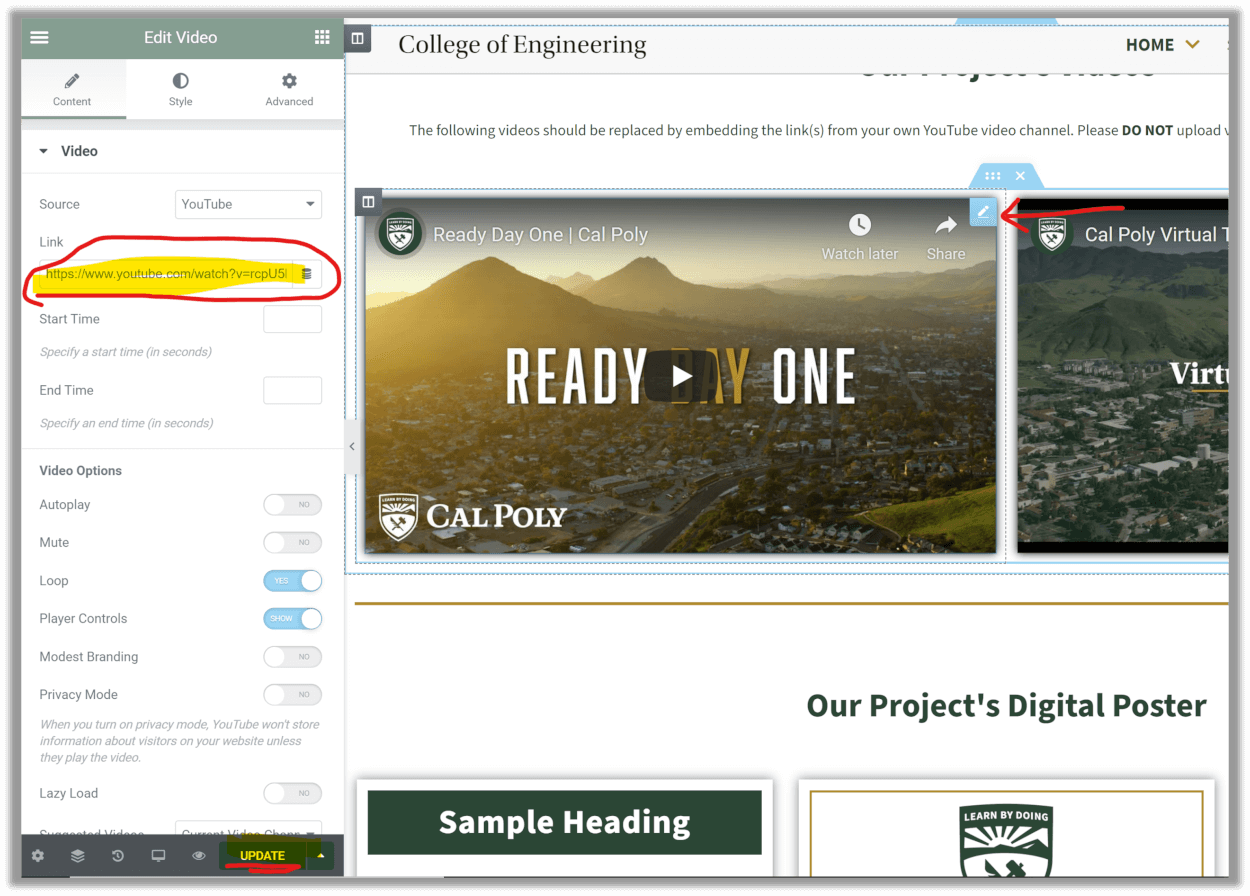
To embed your YouTube videos onto your WordPress webpage, you can just swap out the default videos on the content template. To do this, click on the pencil icon on the right corner of the default video. You’ll see a video link on the left content panel. Replace the link with your own video link, and click “UPDATE” to save.
If you choose not to host your videos on your own YouTube channel, you can save your video files (.MP4, MOV, or WMV) to this OneDrive folder (Cal Poly login is required). A staff member will upload your videos to a Cal Poly YouTube account and will embed them to your webpage on your behalf.
The following video demonstrates the steps for Part VI:
Once you have saved all your edits and are ready to share your webpage with your advisor for review, change the Status and visibility settings of your webpage to Public mode (see Part III, tab “B” of this user guide).
Note: You can also set your page to be Password Protected at this point. This option is recommended if your sponsor requires confidentiality of your webpage until they have reviewed and approved it.
To set your page to Password Protected, select this option in the Status and visibility settings. You will be prompted to create a password that you can then share as needed.
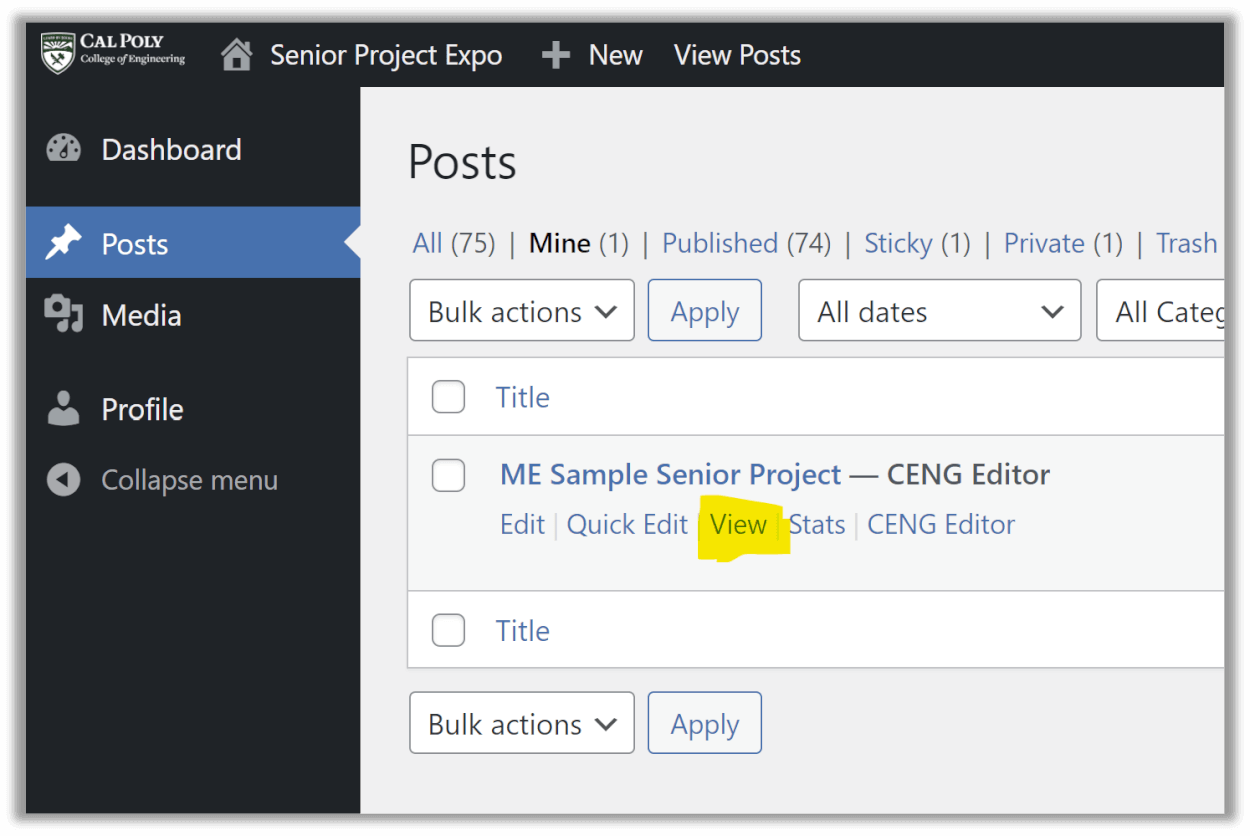
To share your page with others, you’ll need your page’s URL (direct link). To locate that URL, go to the main dashboard, and select “Posts”, hover over the title of your project, and click on the “View” option. Then, just copy the URL from the browser, and share as needed.
That’s it, you’re done!

The following video demonstrates the steps for Part VII: